

人工芝は、庭、庭園、遊び場、屋上、あるいは商業施設の景観を、清潔で緑豊かで、メンテナンスの手間がかからない空間に変えることができます。しかし、人工芝に関する苦情の多くは、芝自体に起因するものではありません。ほとんどの問題は、 インストールミス, 特に基礎の準備、排水設計、継ぎ目の作業、端部の固定などです。.
このガイドでは、最も一般的な 人工芝の設置に関する問題, 原因と予防方法をご紹介します。施工業者に依頼する場合でも、DIYで施工する場合でも、この記事は高額な修理費用を回避し、長持ちする人工芝を楽しむためのお手伝いをします。.
目次
- 人工芝の正しい設置が重要な理由
- 間違い#1:間違った種類の人工芝を選ぶ
- ミス #2: 下地の準備不足(芝生の失敗の原因 #1)
- ミス #3: 排水設計の不備(水たまり、水ぶくれ、悪臭)
- 間違い #4: しわ、波紋、芝の動き
- ミス #5: 目に見える継ぎ目(色の違い、線、隙間)
- ミス #6: 周囲の安全確保が不十分 (端が浮いている、つまずく危険がある)
- 間違い #7: 防草シートの設置を省略または誤った場所に配置
- 間違い #8: 充填が不正確または不十分
- 間違い #9: 膨張と収縮を無視する
- 間違い #10: 適切なツールと機器なしでのインストール
- 人工芝施工業者を雇う際の注意点
- 人工芝設置チェックリスト(概要)
- FAQ: 人工芝の設置に関する問題と失敗
- 1) 人工芝の設置で最もよくある間違いは何ですか?
- 2) 問題が設置の問題か芝生の品質の問題かをどのように判断すればよいですか?
- 3) 人工芝が場所によって色が違って見えるのはなぜですか?
- 4) 芝生は設置前にどれくらい放置しておくべきですか?
- 5) 人工芝は土壌または既存の天然芝の上に直接設置できますか?
- 6) 雨が降った後、人工芝に水たまりができるのはなぜですか?
- 7) 人工芝の下に防草シートを設置すべきでしょうか?
- 8) 芝生が新しいのに継ぎ目が見える理由は何ですか?
- 9) 時間が経つと継ぎ目が剥がれてしまう原因は何ですか?
- 10) インフィルは常に必要ですか?
- 11) ペット用芝生に避けるべき充填材は何ですか?
- 12) コンクリートの上に人工芝を敷くことはできますか?
- 13) すべてを再インストールせずにシワを修正できますか?
- 14) 人工芝の悪臭を防ぐにはどうすればいいですか?
- 15) インストーラーに支払いをする前に何を確認すべきですか?
- まとめ:問題が起きる前に予防する
人工芝の正しい設置が重要な理由
人工芝は長期的な投資です。多くの製品には保証が付いています(多くの場合 8~15歳, (製品の種類やサプライヤーによって異なります)ただし、保証の対象となるのは通常、正しい設置です。不適切な設置は、芝生の寿命を縮め、快適性を損なうだけでなく、安全上の問題を引き起こし、高額な再施工につながる可能性があります。.
専門家による設置は初期費用が高くなる場合がありますが、しわ、沈み込み、継ぎ目のはがれなどの不具合を防ぐことで長期的には費用を節約できます。.
間違い#1:間違った種類の人工芝を選ぶ
すべての人工芝が同じ用途で設計されているわけではありません。製品によって、パイルの高さ、糸の形状、密度、質感、裏地の構造が異なります。.
芝生選びのよくある間違い
交通量の多いスポーツエリアに景観用芝を使用する
住宅の庭にパッティンググリーン用の芝を敷く(密度が高く硬すぎることが多い)
排水と清掃アクセスを計画せずにペットの芝生を選択する
遊び場に装飾用の低密度芝生を使用する
予防方法
購入する前に、スペースの使用方法を定義します。.
子どもたちはそれで遊ぶのでしょうか?
ペットは毎日使用しますか?
多くの人が行き交うでしょうか?
それは純粋に装飾的なものですか?
優良メーカーは、造園、スポーツ、ペットエリア、パッティンググリーンなど、様々な用途に適した製品を提供しています。必ずサンプルをご請求いただき、柔らかさ、回復力、裏打ち強度、排水穴、全体の密度をご確認ください。.
ミス #2: 下地の準備不足(芝生の失敗の原因 #1)
人工芝の基礎となるのがベースです。ベースが適切でなければ、製品の品質に関わらず、人工芝は十分な性能を発揮しません。.
基礎工事の不備による問題
凹凸のある表面、凹凸のある表面、波のある表面
水たまりと排水の失敗
芝生の移動とシワ
高い場所での早期摩耗
有機物の分解によって生じた陥没穴
適切なベース準備とは
安定した基礎には、正しい掘削、清潔な材料、層状の圧縮が必要です。.
ステップ1:すべての有機物を除去する
草、雑草、根、残骸はすべて取り除き、切り株や根株も完全に除去する必要があります。有機物は分解して空洞を作り、後に沈下やシワの原因となります。.
ステップ2:圧縮骨材ベースを設置する
一般的な住宅基準は 75~100mm 圧縮砕石または路盤材。軟弱地盤、多雨地域、または商業用途の場合は、より深い路盤が必要となる場合があります。.
ステップ3:細かいレベリング層を追加する
風化花崗岩や細かい砕石などの薄い均し層は、滑らかさを向上させ、最終的な整地に役立ちます。.
ステップ4:層状に圧縮する
圧縮は複数回、層状に行う必要があります。プレートコンパクターは適切に使用し、省略しないでください。.
基礎工事の不良を示す危険信号
ベースの深さが薄すぎる
設置業者は土壌または既存の芝生の上に芝生を設置します
圧縮装置は使用しない
ベースには有機物または不安定な物質が含まれています
最終表面は排水勾配のない平坦な表面です
ミス #3: 排水設計の不備(水たまり、水ぶくれ、悪臭)
人工芝は天然芝のように水を吸収しません。水は芝の根元から排水され、芝床や敷地内の排水溝を通って排出されます。.
排水障害の兆候
雨上がりの水たまり
湿ったまたはぐにゃぐにゃした部分
芝生の下の水泡や水ぶくれ
コケ、藻、カビ
閉じ込められた湿気による不快な臭い
効果的な排水システムを構築する方法
ベースに傾斜を作る
あ 1–2%スロープ 建物から水を遠ざけるために一般的に推奨されます。.
清潔で透水性の基材を使用する
排水の問題は、地盤に粘土、細粒分が多すぎる、または不安定な材料が含まれているためによく発生します。.
困難な場所の排水を改善する
粘土質の土壌や降雨量の多い地域では、次のような追加の排水が必要になる場合があります。
フランス式排水溝(穴あきパイプ+砂利)
排水路または溝排水溝
排水細胞層
軟弱地盤のジオセル補強
コンクリート設置に関する特別な注意
人工芝はコンクリートの上にも設置できますが、排水対策が必要です。コンクリートには勾配が必要で、端には排水経路が必要です。よくある間違いとして、排水溝のない平坦なコンクリートに人工芝を接着してしまうことが挙げられますが、これは水が溜まり、悪臭の原因となります。.
間違い #4: しわ、波紋、芝の動き
シワは通常、下地処理の不均一、固定不足、または芝の熱膨張・収縮によって発生します。一般的な原因としては、以下のようなものが挙げられます。
設置前に芝生が順応されていない
芝生がきつく張られている
基盤の軟弱部または低圧縮
周囲の固定が不十分
縫い目の接着が弱い
もっと詳しく知りたい場合は 人工芝がシワになる理由とその修復方法, 詳細なガイドをご覧ください 人工芝のしわ.
防止
芝は、カットや固定の前に、ロールからほどき、少し緩めてください。しっかりと固定しますが、過度に伸ばしすぎないようにしてください。壁などの硬い縁の近くには、伸縮隙間を残しておく必要があります。.
ミス #5: 目に見える継ぎ目(色の違い、線、隙間)
継ぎ目は、2つの芝ロールが接合する部分です。継ぎ目が粗末だと見た目が悪くなり、弱点となる可能性があります。.
縫い目の不良の兆候
目に見える縫い目
両側で異なる色の外観
ピース間の隙間
重なり合って隆起した尾根を形成する
時間の経過とともに縫い目が分離する
正しい継ぎ目の取り付け
両方のロールの積み重ね方向が一致していることを確認する
製造エッジを慎重にトリミングする
裏面が目立たないようにしっかりと接合
ジョイントの下の中央にシームテープを使用する
適切な接着剤を塗布し、適切な硬化時間を取る
草の葉が接着剤に絡まないようにする
強力な接着のために硬化中に重しを使用する
「色の違い」に関する重要なヒント“
人工芝は繊維の方向によって色が濃くなったり薄くなったりすることが多いため、同じ商品でもロールを逆方向に敷くと、全く違う芝のように見えます。.
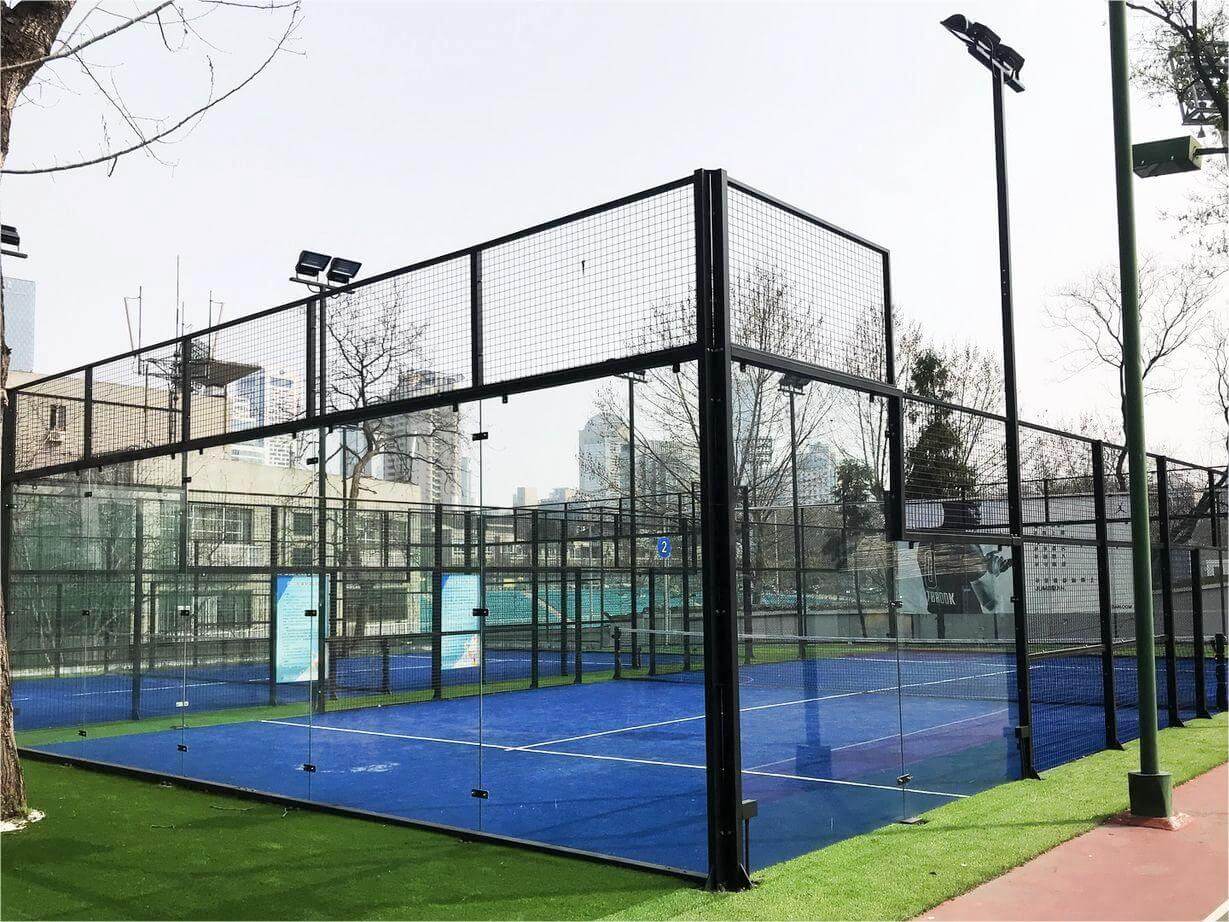
ミス #6: 周囲の安全確保が不十分 (端が浮いている、つまずく危険がある)
持ち上がり、ずれ、および安全上の危険を防ぐために、端を固定する必要があります。.
エッジワークの不良による問題
カールエッジ
足元の芝の動き
国境の隙間
端からの雑草の侵入
つまずきの危険
ベストプラクティス
ファスナーは一般的に 100~300mm 周囲を囲むように設置してください。コーナー、カーブ、通行量の多い場所では、より狭い間隔が必要です。錆びを防ぐため、亜鉛メッキの留め具を使用してください。.
エッジは次のように固定する必要があります。
木材固定ストリップ
コンクリートまたは舗装材
柔らかな風景の中の地下杭
適切なエッジング拘束
間違い #7: 防草シートの設置を省略または誤った場所に配置
防草シートは単なる「おまけ」ではありません。端から雑草が生えてくるのを防ぎ、メンテナンスの手間を軽減します。.
芝生に雑草が生える理由
雑草は周囲の部分から侵入したり、風で飛ばされて埋め戻し材に落ちた種子から侵入したりすることがあります。.
正しい方法
高品質のジオテキスタイル防草シート(多くの場合、 100~125gsm) が正しくインストールされている必要があります。.
ペットエリアの配置に関する注意事項
芝生の表面近くに湿気や臭いがこもるのを防ぐため、ペットエリアの防草シートはシステムの下の方に設置する必要があります。.
間違い #8: 充填が不正確または不十分
インフィルは芝生システムをサポートし、パフォーマンスに影響を与えます。.
インフィルとは
繊維を垂直に保つ
重量と安定性を増す
快適性と弾力性を向上させる
しわや動きを軽減します
排水性を向上させる
よくあるインフィルの間違い
充填量が少なすぎる(芝生がすぐにマットになる)
不均一な充填(硬い部分と柔らかい部分)
ペットエリアでの砂の使用(臭気リスク)
裏地までインフィルをブラシで塗らない
推奨される充填材の種類
造園用の珪砂または丸砂
抗菌インフィル
ペットの臭いを抑えるゼオライト
スポーツ用芝生充填システム
間違い #9: 膨張と収縮を無視する
人工芝は暑さで膨張し、寒さで収縮します。.
動きを無視すると何が起こるか
暑い天候での座屈
寒い天候で端から離れる
シーム応力と剥離
しわと波紋
防止
設置前に芝生を馴染ませてください。固定構造物の近くには、わずかな膨張隙間を設けてください。芝生は過度の張力をかけずにしっかりと固定してください。.
間違い #10: 適切なツールと機器なしでのインストール
近道は失敗の原因になります。人工芝の設置には専用の道具が必要です。.
必須ツール
プレートコンパクター
芝刈り機または鋭利な万能ナイフ
シームテープと接着ツール
測定およびマーキングツール
インフィルスプレッダー
電動ブラシまたは硬いほうき
DIY 設置業者はツールをレンタルできますが、レンタルを省略すると、目に見えて長期的な問題が発生することがよくあります。.
人工芝施工業者を雇う際の注意点
次のような場合、インストーラーは手抜きをしている可能性があります。
「ベーシック vs プレミアム」のインストールオプションを提供する
基礎の深さや基礎材料について議論するのは避ける
市場平均をはるかに下回る見積もり
排水計画を省略
最近のプロジェクトの写真や参考資料がない
不安定または汚染された基材を使用する
縫い目を急ぎ、毛足の方向を無視する
専門の設置業者は、掘削の深さ、基礎設計、排水計画、継ぎ目方法、充填材の選択を明確に説明する必要があります。.
人工芝設置チェックリスト(概要)
信頼性の高いインストールには以下が必要です。
用途に適した芝生の選択
有機物を残さずに完全に掘削
安定した圧縮基礎(通常は75~100mm、必要に応じてそれ以上)
適切な勾配(一般的には1~2%)
防草シートの正しい設置
適切なテープと接着剤で継ぎ目をきれいに整えます
100~300mmごとに強力な周囲固定
固定前の芝生の順応
適切な充填材の選択と均一なブラッシング
FAQ: 人工芝の設置に関する問題と失敗
1) 人工芝の設置で最もよくある間違いは何ですか?
不適切な基礎準備は、最もよくあるミスです。薄い、不均一な、あるいは圧縮不良な基礎は、沈下、凹凸、しわ、そして排水の問題を引き起こします。芝生の価格よりも、基礎の品質の方が重要です。.
2) 問題が設置の問題か芝生の品質の問題かをどのように判断すればよいですか?
施工上の問題により、芝生の形状が変化することがよくあります。例えば、波紋、沈下、継ぎ目の剥離、水たまりなどです。芝の品質の問題は、繊維の裂け、異常な抜け毛、紫外線による退色、裏地のひび割れなどとして現れることが多いです。問題が凹凸や動きである場合は、通常、施工に原因があります。.
3) 人工芝が場所によって色が違って見えるのはなぜですか?
最も一般的な原因はパイルの方向です。人工芝は繊維の方向によって光の反射が異なります。ロールが異なる方向に敷設されていると、同じ種類の芝であっても、芝生がまだら模様に見えてしまうことがあります。.
4) 芝生は設置前にどれくらい放置しておくべきですか?
芝は、カットや固定の前にロールから出して、自然乾燥させてください。暖かい季節であれば数時間で十分ですが、寒い季節には一晩かけて馴染ませる必要がある場合があります。これにより、輸送時のシワが軽減され、継ぎ目の品質が向上します。.
5) 人工芝は土壌または既存の天然芝の上に直接設置できますか?
土や芝生の上に直接設置することはお勧めしません。土壌は湿気で移動し、凹凸が生じます。また、既存の芝生は分解して空洞を形成します。長期的な性能を維持するには、しっかりとした基礎が必要です。.
6) 雨が降った後、人工芝に水たまりができるのはなぜですか?
水たまりは、地盤が不均一であったり、敷地に傾斜がなかったり、水が排出されない経路があったりすると発生します。粘土質の土壌や平坦なコンクリートの設置が原因となることがよくあります。排水は、芝生の排水穴だけに頼るのではなく、包括的なシステムとして設計する必要があります。.
7) 人工芝の下に防草シートを設置すべきでしょうか?
雑草の生育を抑え、メンテナンスの手間を省くため、防草シートの設置をお勧めします。排水の問題を避けるために、適切に設置する必要があります。ペットエリアでは、芝生の真下に設置すると湿気がこもり、悪臭のリスクが高まる可能性があります。.
8) 芝生が新しいのに継ぎ目が見える理由は何ですか?
目に見える継ぎ目は、通常、パイルの方向の不一致、トリミングの不備、隙間、重なり、または接着剤に挟まった繊維などが原因で発生します。継ぎ目は、正確なカット、正しい方向の調整、そして適切な接着が必要です。.
9) 時間が経つと継ぎ目が剥がれてしまう原因は何ですか?
シームの不具合は、接着力が弱い、硬化時間が適切でない、硬化中に湿気を含む、あるいは下地の劣化や周囲の固定が弱いことによる動きなどが原因で発生します。また、芝を過度に引っ張ると、シームの張力が高まり、剥がれが生じることもあります。.
10) インフィルは常に必要ですか?
インフィルは、繊維を支え、安定性を高め、耐久性を向上させるため、ほとんどの景観用芝生に推奨されます。インフィルを省略すると、マット状になったり、動いたりすることがよくあります。インフィルを使用しない特殊な製品もありますが、すべての気候や用途に適しているわけではありません。.
11) ペット用芝生に避けるべき充填材は何ですか?
一般的な砂は湿気や臭いを吸収しやすいため、ペット用の芝生には適していません。ゼオライトや抗菌剤などの防臭材を適切な排水設計とすすぎと組み合わせることで、より優れた効果を発揮することがよくあります。.
12) コンクリートの上に人工芝を敷くことはできますか?
排水を適切に計画すれば、コンクリートの上に人工芝を敷設できます。コンクリートは傾斜が必須で、端の周囲には排水経路を確保する必要があります。よくある間違いは、端を完全に密閉してしまうことです。そうすると水が溜まってしまいます。.
13) すべてを再インストールせずにシワを修正できますか?
軽度のシワは、留め具を外し、芝を再び伸ばし、再度固定することで修正できる場合があります。土台の沈下や軟弱な部分によって生じたシワは、芝を持ち上げて土台を補修することで完全に修復できます。.
14) 人工芝の悪臭を防ぐにはどうすればいいですか?
臭い対策は設置から始まります。適切な傾斜、排水の速さ、適切な充填、そして定期的なすすぎが鍵となります。ペットエリアには、消臭効果のある充填材を使用し、定期的に酵素洗浄を行うと効果的です。.
15) インストーラーに支払いをする前に何を確認すべきですか?
継ぎ目の視認性、端の安定性、平坦性、パイルの方向の均一性を確認してください。複数の箇所に水をかけて排水性をテストしてください。また、インフィルが均一にブラシで塗り込まれ、端が浮き上がっていないことも確認してください。.
まとめ:問題が起きる前に予防する
人工芝は長年美しい外観を保ちますが、それは正しく施工された場合に限ります。適切な基礎の準備、排水設計、継ぎ目の調整、端の固定、そして適切な充填を行うことで、人工芝の施工に関するほとんどの問題は防ぐことができます。.