









Artificial grass can transform a yard, garden, playground, rooftop, or commercial landscape into a clean, low-maintenance space that stays green year-round. But most turf failures do not come from the product itself. They come from installation mistakes — poor base preparation, bad drainage, visible seams, unsecured edges, and a handful of other avoidable errors.
Quick answer: The most common artificial grass installation mistakes are (1) poor base preparation, (2) inadequate drainage, (3) visible seams caused by pile direction mismatch, (4) unsecured edges, (5) skipping or misplacing the weed barrier, (6) insufficient infill, (7) ignoring thermal expansion, (8) installing without proper tools, (9) reflection damage from windows, and (10) choosing low-quality turf. Getting the base right matters more than any other single factor — a thin, uneven, or poorly compacted base causes sinking, wrinkles, drainage failure, and premature wear regardless of how good the turf is.
This guide covers 12 specific mistakes, what causes each one, and how to prevent it. Whether you are hiring a contractor or installing turf yourself, the information below will help you avoid costly rework and get a lawn that lasts.
Γιατί έχει σημασία η σωστή εγκατάσταση τεχνητού γρασιδιού
Artificial turf is a long-term investment. Many products in the industry carry warranties in the range of 5 to 8 years, depending on product type and supplier, but warranty coverage typically requires correct installation. Poor installation shortens the turf’s useful life, creates safety hazards, and often leads to repairs that cost more than doing the job properly the first time.
Professional installation may cost more upfront, but it prevents the most common failures: wrinkles, sinking, seam separation, edge lifting, and drainage problems. For DIY installers, understanding what goes wrong — and why — is the difference between a lawn that lasts a decade and one that needs replacing in two years.
Mistake #1: Choosing the Wrong Type of Artificial Grass
Not all artificial grass is designed for the same purpose. Products differ in pile height, yarn shape, density, texture, and backing structure. Choosing the wrong type for the intended application is a mistake that no amount of careful installation can fix.
Common Selection Errors
- Using soft landscape turf in high-traffic sports areas where it mats flat quickly
- Installing putting green turf (dense and stiff) in a residential yard where comfort matters
- Επιλογή χλοοτάπητα για κατοικίδια χωρίς σχεδιασμό αποστράγγισης και πρόσβασης καθαρισμού
- Using decorative low-density turf in play areas that receive heavy use
How to Prevent It
Before purchasing, define how the space will be used. Will children play on it? Will pets use it daily? Will it receive heavy foot traffic? Is it primarily decorative?
Manufacturers offer product lines designed for landscaping, sports, pet areas, and putting greens — each engineered for different performance requirements. Request samples before buying. Check softness, fiber recovery, backing strength, drainage hole layout, and overall density. A product that looks good in a photo may feel wrong underfoot or perform poorly in your specific application.
Mistake #2: Poor Base Preparation and Uneven Surfaces
The base is the foundation of an artificial lawn. If the base is wrong, the turf will not perform well regardless of product quality. This is the single most common cause of artificial grass failure.
What Goes Wrong
- Uneven surfaces with bumps, dips, and waves that are visible through the turf
- Water pooling because the base has no slope
- Turf shifting and wrinkling as the base settles
- Premature wear on high spots where foot traffic concentrates
- Sink holes caused by decomposing organic material left under the base
Even minor bumps or stones can be noticeable through a smooth lawn surface, much like laying carpet over an uneven floor.
What Proper Base Preparation Looks Like
A stable base requires correct excavation, clean materials, and layered compaction. The process generally follows four steps:
Step 1: Remove all organic material. All grass, weeds, roots, and debris must be excavated. Stumps and root balls should be ground out completely. Organic material decomposes over time, creating voids that lead to sinking and wrinkles.
Step 2: Install a compacted aggregate base. A common residential standard is 75–100mm of compacted crushed stone or road base. Soft soil, heavy rainfall regions, or commercial applications may require a deeper base.
Step 3: Add a fine leveling layer. A thin layer of decomposed granite or fine crushed stone improves surface smoothness and helps with final grading.
Step 4: Compact in layers. Compaction should be done in multiple passes with a plate compactor — not skipped. Each layer should be compacted before the next is added.
Red Flags of Poor Base Work
- Base depth is noticeably thin
- Installer lays turf directly over soil or existing grass
- Δεν χρησιμοποιείται εξοπλισμός συμπύκνωσης
- Η βάση περιέχει οργανικά ή ασταθή υλικά
- Η τελική επιφάνεια είναι επίπεδη χωρίς κλίση αποστράγγισης
Mistake #3: Poor Drainage Design
Artificial grass does not absorb water like natural grass. Water must drain through the turf backing and move away through the base and site drainage. When drainage is not designed as a complete system, water has nowhere to go.
Signs of Drainage Failure
- Standing water on the surface after rain
- Soggy or squishy spots that never fully dry
- Water bubbles or blisters forming under the turf
- Moss, algae, or mildew growth
- Δυσάρεστες οσμές από παγιδευμένη υγρασία
How to Build Effective Drainage
Build slope into the base. A 1–2% slope is commonly recommended to guide surface water away from buildings and prevent pooling. The slope should be established in the base layer, not just the turf surface.
Use clean, permeable base materials. Drainage problems often occur because the base contains clay, excessive fines, or unstable materials that block water movement. Crushed stone or road base with proper gradation allows water to percolate through.
Upgrade drainage in difficult sites. In clay soil or high-rainfall areas, additional drainage may be necessary:
- French drains (perforated pipe surrounded by gravel)
- Κανάλια αποστράγγισης ή αποχετεύσεις τάφρων
- Στρώσεις κυψελών αποστράγγισης
- Geocell reinforcement for weak or soft soil
Installing on Concrete
Artificial grass can be installed on concrete, but drainage must be planned. Concrete should have slope, and water must have an exit route around the edges. A common mistake is gluing turf directly to flat concrete with no drainage gap, which traps water underneath and causes odor and mildew.
Mistake #4: Wrinkles, Ripples, and Turf Movement
Wrinkles develop when the base is uneven, the turf is stretched too tightly, or thermal expansion and contraction are not accounted for. Common causes include:
- Turf not acclimated before installation — shipping creases remain
- Turf stretched too tightly during fixing
- Base soft spots or low compaction allowing movement
- Ανεπαρκής περιμετρική στερέωση
- Weak seam bonding that allows separation
Prevention: Turf should be unrolled and allowed to relax before cutting and fixing. In warm weather, several hours is often enough. In cold weather, overnight acclimation may be needed. The turf should be secured firmly but never overstretched. Small expansion gaps should be left near rigid edges like walls and concrete borders to accommodate thermal movement.
Learn more: Artificial Turf Wrinkles: Causes, How to Fix Them, and Prevention Tips
Mistake #5: Visible Seams and Incorrect Pile Direction
Seams are where two rolls of turf meet. Poor seams ruin the appearance of an installation and create weak points that can separate over time. The most common cause of visible seams is not the seam itself — it is pile direction.
Signs of Bad Seam Work
- Visible seam lines running across the lawn
- Different color appearance on each side of the seam
- Gaps between turf pieces
- Επικαλύπτει δημιουργώντας υπερυψωμένες ράχες
- Seams separating weeks or months after installation
Correct Seam Installation
- Ensure pile direction matches on both rolls before cutting
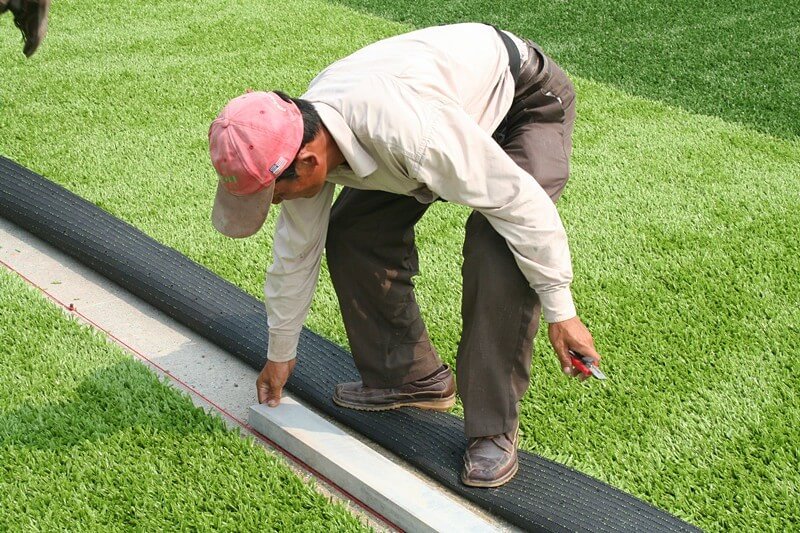
- Trim manufacturing edges carefully to create clean butt joins
- Bring edges together tightly with minimal backing visible
- Χρησιμοποιήστε ταινία ραφής στο κέντρο κάτω από την ένωση
- Apply adhesive correctly and allow proper curing time
- Avoid trapping grass blades in the glue
- Use weights during curing for strong, flat bonding
Avoid using cable ties or timber under the join as anchor points. These materials can cause rippling when the grass expands and contracts with temperature changes. Use high-quality joining tape, adhesive, or a strong cloth-based self-adhesive tape designed for artificial grass.
Why Pile Direction Matters
Artificial grass reflects light differently depending on fiber direction. If two rolls are installed with pile running in opposite directions, the lawn will look like two different shades of green — even when both rolls are the same product. Always check pile direction when laying each piece, and ensure consistency when joining sections. Correcting a pile direction mistake after fixing is laborious and often requires relaying one of the pieces.
Mistake #6: Inadequate Perimeter Securing
Edges are the most vulnerable part of an artificial lawn. If they are not secured properly, the turf will lift, shift, and create problems that extend well beyond appearance.
Unsecured edges lead to curling, turf movement underfoot, gaps at borders, weed intrusion from surrounding soil, and tripping hazards. Water and debris can seep underneath the lawn, causing damage to the base and creating odor issues.
Βέλτιστη πρακτική: Fasteners should be installed every 100–300mm around the perimeter. Corners, curves, and high-traffic zones require tighter spacing. Galvanized fasteners should be used to reduce rusting over time.
Edges can be secured to timber fixing strips, concrete or pavers, subsurface stakes in soft landscapes, or purpose-made edging restraints. The method depends on the surrounding surface and the lawn design, but every edge should be fixed — not left loose or weighted down with temporary materials.
Mistake #7: Skipping or Misplacing the Weed Barrier
A weed barrier is not optional extra work. Without it, weeds and other plants can grow through the artificial lawn, particularly when turf is laid directly on or near fertile soil. Weeds enter from perimeter areas and from wind-blown seeds that settle into the infill over time.
Correct method: A quality geotextile weed barrier — commonly around 100–125gsm — should be installed as part of the base system. It should be placed correctly within the layered structure to allow drainage while blocking root growth.
Pet area note: In pet installations, the weed barrier should be placed lower in the base system — not directly under the turf surface. Placing it too high can trap moisture and increase odor near the surface where pets walk.
Additionally, keep an eye on leaf litter during autumn and pollen during spring and summer. Both can accumulate on the turf surface, clog drainage paths, and decompose into organic material that requires cleanup. Regular brushing prevents buildup.
Mistake #8: Incorrect or Insufficient Infill
Infill is the material brushed into the turf after installation. It supports the turf system and affects how the lawn performs over time. Skipping infill — or using the wrong type — leads to matting, instability, and reduced durability.
What Infill Does
- Keeps fibers upright and prevents matting
- Adds weight and stability to the turf system
- Improves comfort and resilience underfoot
- Helps reduce wrinkles and turf movement
- Improves drainage behavior by creating pore space
Common Infill Mistakes
- Too little infill — turf mats flat quickly under traffic
- Uneven distribution — creates hard and soft spots
- Using standard sand in pet areas — holds moisture and odor
- Not brushing infill down to the backing — it sits on the surface and washes away
Recommended Infill Types
- Silica sand or rounded sand for general landscaping
- Antimicrobial infill for areas where hygiene is a priority
- Ζεόλιθος για τον έλεγχο της οσμής των κατοικίδιων ζώων
- Sports-specific infill systems for sports turf applications
Non-infill products exist and work well in certain climates and applications, but they are not a universal solution. Consider the climate, traffic level, and application before choosing a non-infill system.
Mistake #9: Ignoring Expansion and Contraction
Artificial grass expands in heat and contracts in cold. This is a physical property of the synthetic materials used in the backing and yarn. When movement is not accounted for, problems appear seasonally.
What happens when expansion and contraction are ignored:
- Buckling in hot weather as the turf has no room to expand
- Pulling away from edges in cold weather as the turf contracts
- Seam stress leading to separation
- Wrinkles and ripples that appear and disappear with temperature
Prevention: Acclimate the turf before installation so it reaches a neutral state. Leave small expansion gaps near fixed structures like walls, concrete pads, and edging. Secure the turf firmly without excessive tension — stretching it tight during installation means it has no slack to absorb expansion when temperatures rise.
Mistake #10: Installing Without Proper Tools
Shortcuts cause failures. Artificial grass installation requires specific tools, and skipping them usually leads to visible and long-term problems.
Essential Tools
- Plate compactor — for base preparation
- Turf cutter or sharp utility knife — for clean cuts
- Seaming tape and adhesive tools — for joins
- Measuring and marking tools — for accurate layout
- Infill spreader — for even distribution
- Power brush or stiff broom — for brushing infill into the backing
DIY installers can rent most of these tools. The cost of rental is minimal compared to the cost of fixing problems caused by skipping them. A plate compactor alone makes the difference between a base that lasts and one that sinks within a year.
Mistake #11: Reflection Damage from Windows and Surfaces
This is one of the most overlooked installation mistakes — and one that can damage turf that was otherwise perfectly installed. During hot or bright weather, sunlight reflected from mirrored surfaces, energy-efficient windows, or double-glazed glazing can concentrate enough heat to melt or burn artificial grass fibers.
Modern low-emissivity (Low-E) windows are particularly prone to causing this type of damage because they reflect solar energy outward rather than absorbing it. The reflected beam can reach temperatures high enough to soften or melt polyethylene and polypropylene yarn.
How to prevent it: Before starting installation, check for windows, glass panels, or polished metallic surfaces that face the turf area. If reflective surfaces are present, create shade through landscaping, awnings, or window film. Address this before installation rather than after the turf is damaged. Once fibers are melted, the affected section must be replaced — there is no repair that restores the original appearance.
Mistake #12: Choosing Low-Quality Artificial Grass
It is tempting to choose the cheapest artificial grass available, especially when products look similar in photographs. But low-cost turf often lacks the durability and longevity to justify even its lower price.
Subpar products may fade under UV exposure, deteriorate at the backing, or flatten under light foot traffic. What looks acceptable on day one can look worn and patchy within a year. The cost of removing and replacing cheap turf exceeds the savings from choosing it in the first place.
Quality should be assessed based on: yarn material and shape, UV stabilizer content, backing strength and drainage design, stitch density, and overall construction. At Arturf, we focus on manufacturing turf that balances performance and cost — not competing on being the cheapest option. We recommend requesting samples and technical specifications before making a purchasing decision, regardless of which supplier you choose.
Red Flags When Hiring an Artificial Grass Installer
If you are hiring a contractor, certain behaviors signal that the installation may be below standard. An installer may be cutting corners if they:
- Offer “basic vs. premium” installation options — proper installation has one standard
- Avoid discussing base depth and base materials in detail
- Quote far below market average without explaining how costs are reduced
- Skip drainage planning or dismiss it as unnecessary
- Δεν έχω πρόσφατες φωτογραφίες ή αναφορές έργων
- Χρησιμοποιήστε ασταθή ή μολυσμένα βασικά υλικά
- Βγάλτε γρήγορα τις ραφές και αγνοήστε την κατεύθυνση του πέλους
- Cannot clearly explain their excavation depth, base design, drainage plan, seam method, and infill choice
A professional installer should be able to explain each of these elements clearly and confidently. If they cannot, find someone who can.
Artificial Grass Installation Checklist
Use this checklist before, during, and after installation to verify that key steps are completed:
- Correct turf selected for the intended application (landscaping, sports, pet, decorative)
- Full excavation completed — no organic material left behind
- Stable compacted base installed (commonly 75–100mm or more as needed)
- Proper drainage slope established (commonly 1–2%)
- Weed barrier installed at the correct layer in the system
- Turf acclimated before cutting and fixing
- Pile direction consistent across all sections
- Seams aligned cleanly with quality tape and adhesive
- Perimeter secured with fasteners every 100–300mm
- Infill selected for the application and brushed in evenly
- Expansion gaps left near rigid structures
- Reflective surfaces identified and shaded if necessary
FAQ: Common Questions About Installation Problems
What is the most common artificial grass installation mistake?
Poor base preparation. A thin, uneven, or poorly compacted base causes sinking, bumps, wrinkles, and drainage problems. Base quality matters more than turf price — getting the base right is the single most important step in any installation.
How can I tell if the problem is installation or turf quality?
Installation problems usually change the shape of the lawn: ripples, sinking, seam separation, pooling water, or edge lifting. Turf quality problems show in the material itself: fibers splitting, abnormal shedding, UV fading, or backing cracks. If the problem is unevenness or movement, installation is almost always the cause.
Why does my artificial grass look like different colors in different areas?
Pile direction. Artificial turf reflects light differently depending on which way the fibers lean. If two rolls are installed with pile running in opposite directions, they will appear as different shades — even when the turf is from the same production batch. This is the most common cause of patchy-looking color on a new installation.
Can artificial grass be installed directly over soil or existing natural grass?
No. Soil shifts with moisture changes and causes unevenness. Existing grass decomposes and creates voids underneath. A properly excavated and compacted base is required for long-term performance. Laying turf directly on soil is one of the most common shortcuts that leads to early failure.
Why do I have puddles on my artificial grass after rain?
Puddles form when the base is uneven, the site has no slope, or water has no exit route. Clay soil and flat concrete installations are common causes. Drainage must be designed as a complete system — the turf’s drainage holes alone are not enough if the base and site do not move water away.
Should I install a weed barrier under artificial grass?
Yes. A quality geotextile weed barrier (commonly around 100–125gsm) reduces weed growth from surrounding soil and lowers long-term maintenance. In pet areas, place it lower in the base system to avoid trapping moisture and odor near the surface.
Is infill always required?
Infill is recommended for most landscape turf because it supports fibers, adds stability, and extends the turf’s useful life. Skipping infill often leads to matting and movement. Non-infill products exist and work in certain climates and applications, but they are not suitable for every situation — consider traffic, climate, and appearance expectations before choosing a non-infill system.
What should I check before paying the installer?
Check four things: (1) Walk the entire lawn and look for visible seams, color differences, or wrinkles. (2) Push down on edges to confirm they are secured — nothing should lift. (3) Pour water in several areas and confirm it drains without pooling. (4) Check that infill is brushed in evenly and no bare patches remain. If any of these fail, raise them before making final payment.
συμπέρασμα
Most artificial grass problems are preventable. The base needs to be properly excavated, filled with clean aggregate, compacted in layers, and sloped for drainage. Seams need matching pile direction, clean cuts, and proper adhesive. Edges need fixing every 100–300mm. Infill needs to be the right type for the application, evenly distributed. Expansion and contraction need to be accommodated. Reflective surfaces need to be identified before installation, not after the turf melts.
If you are comparing turf suppliers or planning a project, the same principles apply: define your application, request samples, check specifications, and do not choose on price alone. A well-installed, quality turf lawn can perform well for many years. A poorly installed one — regardless of turf quality — will cause problems from the first season.