
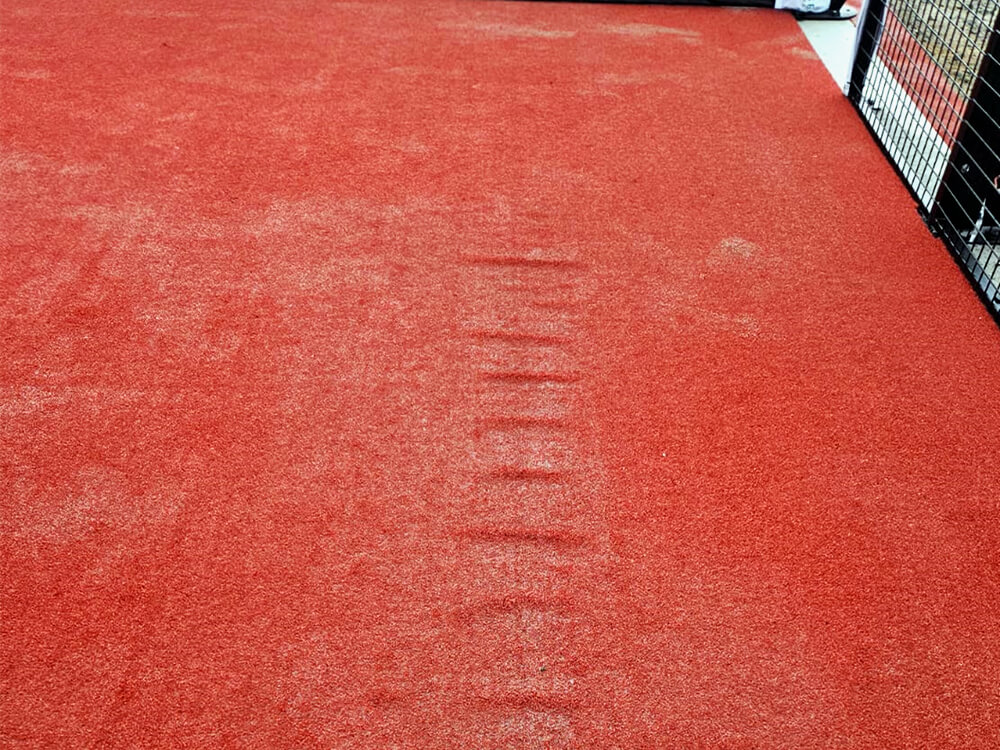
تُعدّ التجاعيد والتموجات والطيات في العشب الصناعي من المشاكل الشائعة، خاصةً خلال الطقس الحار أو عندما لا يتم تركيب العشب تحت الشد المناسب. ورغم أن تجاعيد العشب قد تبدو خطيرة، إلا أنها عادةً ما تكون قابل للإصلاح إذا تم التعامل معها بشكل صحيح وفي وقت مبكر.
ستتعلم في هذا الدليل الشامل ما يلي:
- لماذا تحدث تجاعيد العشب الصناعي
- كيفية إصلاح تجاعيد العشب خطوة بخطوة
- كيفية منع التجاعيد أثناء التركيب والاستخدام طويل الأمد
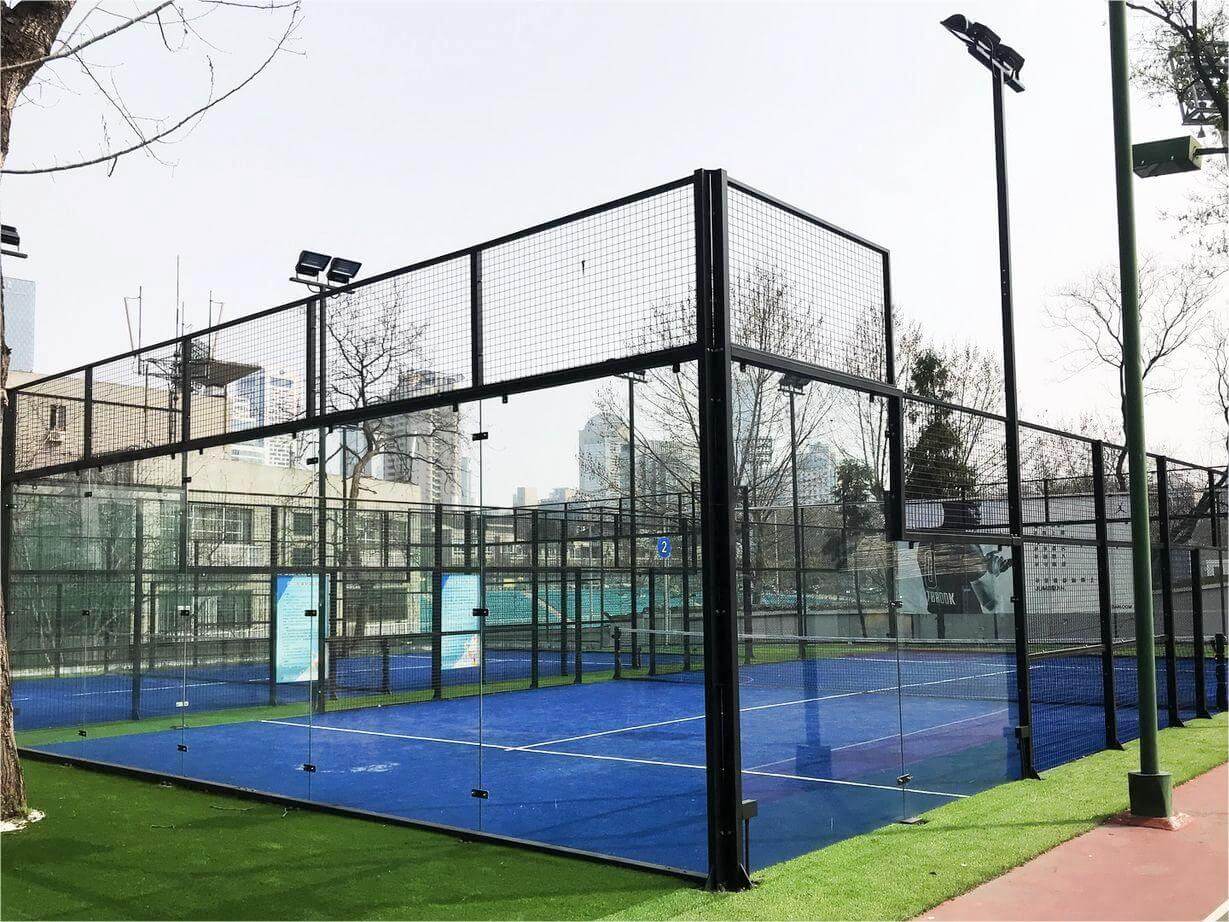
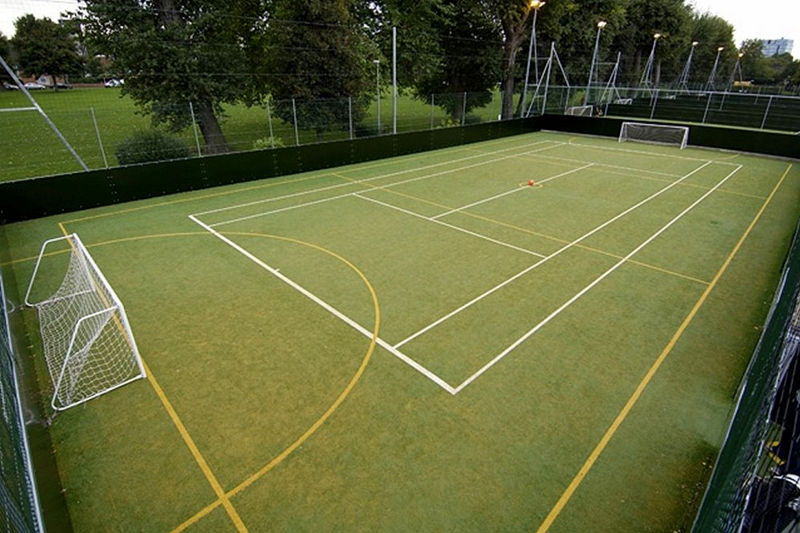
ينطبق هذا الدليل على عشب تنسيق الحدائق، وعشب الحدائق، والعديد من تطبيقات العشب الرياضي.
جدول المحتويات
تجاعيد العشب الصناعي: ملخص الحلول السريعة
عادة ما تحدث تجاعيد العشب الصناعي بسبب التمدد الحراري، أو عدم كفاية الشد، أو ضعف تثبيت المحيط، أو عدم كفاية حشوة الحصى. لإزالة التجاعيد، قم بتدفئة العشب (لمدة ساعة إلى ساعتين)، ثم أزل الحشوة من المنطقة، وفكّ المثبتات، وافرد العشب، وأعد تثبيت الحواف (بمسافة 150-300 مم)، ثم أعد وضع الحشوة ووزعها بالتساوي. ولمنع التجاعيد، قم بإنشاء قاعدة فرعية ثابتة (ضغط 95-98%)، واترك العشب يتأقلم (لمدة ساعتين إلى 24 ساعة)، وقم بشده أثناء التركيب، وضع الوزن المناسب من الحشوة (عادةً حوالي 5 كجم/م² حسب نوع العشب).
لماذا يتجعد العشب الصناعي؟
تحدث تجاعيد العشب الصناعي عادةً بسبب عدم استقرار نظام العشب بشكل كامل. وتشمل الأسباب الأكثر شيوعًا ما يلي:
1) التمدد والانكماش الحراري
تتمدد الطبقة الخلفية للعشب الصناعي قليلاً عند درجات الحرارة المرتفعة وتنكمش عند انخفاضها. قد تُسبب هذه الحركة الطبيعية تموجات إذا لم يتم تثبيت العشب وتثبيته بشكل صحيح.
نقطة رئيسية: الحركة الحرارية أمر طبيعي، ولكن يمكن منع التجاعيد بالتركيب الصحيح.
2) عدم كفاية الشد أثناء التركيب
يجب تركيب العشب الصناعي تحت ضغط (كما هو الحال مع السجاد). إذا أهمل الفنيون عملية الشد أو استعجلوا في التثبيت، فقد تظهر التجاعيد فورًا أو تتطور لاحقًا.
3) عدم كفاية الحشو (الحصى)
يوفر الحشو الصابورة, وهذا يعني أنه يضيف وزنًا وثباتًا للمساعدة في الحفاظ على العشب مسطحًا وآمنًا.
يساعد نظام التعبئة الصحيح على ما يلي:
- قم بتثبيت دعامة العشب.
- تقليل الحركة والانزلاق
- ألياف داعمة وتحسين المرونة
- يقلل من خطر التجاعيد في الطقس الحار
4) تثبيت محيطي ضعيف
تُعد الحواف الجزء الأكثر عرضة للتلف في التركيب. فإذا كانت عملية تثبيت المحيط غير محكمة بما فيه الكفاية، فقد يتحرك العشب بمرور الوقت، مما يتسبب في ظهور تموجات وتجاعيد.
5) مشاكل عدم استواء الطبقة الأساسية أو غشاء مكافحة الأعشاب الضارة
تحتفظ الطبقة الخلفية للعشب الصناعي بخصائص السطح الموجود أسفلها. فإذا كانت هذه الطبقة تحتوي على نتوءات أو مناطق رخوة أو ضغط غير متساوٍ، فقد يتشكل على العشب تموجات مرئية.
أيضًا، إذا كان غشاء مكافحة الأعشاب الضارة الموجود أسفله مطويًا أو متكتلًا، فقد تظهر تلك الخطوط من خلال العشب.
6) طيات التغليف والتخزين (قبل التركيب)
يتم توصيل العشب على شكل لفائف. التموجات الطفيفة بعد فرد اللفائف أمر طبيعي وتختفي عادةً بعد أن يسترخي العشب تحت أشعة الشمس.
كيفية إصلاح التجاعيد في العشب الصناعي (خطوة بخطوة)
يمكن تصحيح معظم التجاعيد باستخدام حرارة + تمديد + إعادة تثبيت + حشو.
الخطوة الأولى: تدفئة دعامة العشب
ضع العشب في ضوء الشمس المباشر لـ من ساعة إلى ساعتين. هذا يخفف من صلابة الطبقة الخلفية ويسمح للعشب بالاسترخاء، مما يجعل عملية التمدد أكثر فعالية.
الخطوة الثانية: إزالة الحشوة من المنطقة المتجعدة
إذا كانت الأرضية العشبية قد تم ملؤها بالفعل، فقم بإزالة الحشو من المنطقة المتجعدة أولاً. هذا مهم للأسباب التالية:
- أنت بحاجة إلى الوصول إلى المسامير/الدبابيس/دبابيس التثبيت
- تكون تمارين التمدد أكثر فعالية عندما يكون العشب حر الحركة
- قد يؤدي عدم استواء الحصى إلى تفاقم التجاعيد
الخطوة 3: فكّ المثبتات بحرص
قم بإزالة المسامير/الدبابيس/المشابك المحيطة بالمنطقة المتجعدة.
تنبيه هام: إذا تم تركيب العشب لفترة طويلة، فقد تلتصق المثبتات بالقاعدة بسبب الرطوبة والأكسدة. وقد يؤدي الشد بقوة مفرطة إلى تلف ألياف الدعم وتكوين "حفر" على السطح.
الخطوة الرابعة: شدّ العشب بإحكام باستخدام أداة شدّ السجاد/أداة شدّ العشب
هذه هي الطريقة الأكثر فعالية:
- ثبّت أحد الجانبين بإحكام
- مدّ العشب باتجاه التجاعيد
- اعمل تدريجياً حتى يصبح السطح مستوياً ومشدوداً
الخطوة الخامسة: إعادة تثبيت العشب بشكل صحيح
أعد تأمين المحيط ونقاط التثبيت الرئيسية:
- تباعد مثبتات المحيط: 150-300 مم
- زيادة كثافة التثبيت في المناطق ذات الحركة المرورية العالية والزوايا
غالباً ما تعود التجاعيد عندما يتم تثبيت العشب بشكل غير محكم عند الحواف فقط.
الخطوة 6: أعد وضع الحشوة وقم بتوزيعها بالفرشاة
بعد أن يصبح العشب مستوياً:
- قم بتوزيع الحشو بالتساوي
- قم بتوزيع الحشوة على العشب باستخدام مكنسة صلبة أو فرشاة كهربائية.
- ضمان التوزيع المتساوي على السطح
مرجع عام: تستخدم العديد من أنظمة العشب ما يقارب 5 كجم/م² من مواد الحشو، ولكن الكمية الصحيحة تعتمد على نوع العشب وارتفاع الوبر والاستخدام المقصود.
الخطوة 7 (إذا لزم الأمر): قص وإعادة خياطة المنطقة المتجعدة
إذا كان التجعد شديدًا أو تشوهت الطبقة الخلفية بشكل دائم، فقد يلزم حل احترافي:
- قص الجزء المتجعد
- يمكن فردها بشكل مسطح
- أعد خياطة اللحام باستخدام شريط اللحام + المادة اللاصقة
- أعد وضع الحشوة ونظفها بالفرشاة
ينبغي القيام بذلك بعناية للحفاظ على قوة اللحام ومظهر السطح.
هل يمكن أن تصبح تجاعيد العشب دائمة؟
نعم. يمكن لطبقة العشب الصناعي أن "تتذكر" الأشكال. إذا تعرضت التجاعيد لأشعة الشمس القوية لفترات طويلة، فقد يصبح من الصعب - أو المستحيل - إزالتها.
توصية: قم بإصلاح التجاعيد في أسرع وقت ممكن.
كيفية منع التجاعيد في العشب الصناعي (أفضل الممارسات)
الوقاية أسهل وأرخص من الإصلاح. اتبع ممارسات التركيب المجربة التالية:
1) اترك العشب يتأقلم قبل قصه
افرد العشب واتركه مستوياً:
- الحد الأدنى: ساعاتين
- أفضل الممارسات: 24 ساعة
يساعد ذلك على إرخاء الطبقة الخلفية ويقلل من تجاعيد التغليف.
2) بناء قاعدة فرعية ثابتة وغير متحركة
يُعدّ تغيير قاعدة المكياج سببًا رئيسيًا للتجاعيد على المدى الطويل. ومن أفضل الممارسات ما يلي:
- حفر وإزالة التربة العضوية
- قم بتركيب مادة أساسية غير قابلة للتمدد
- مضغوطة في طبقات
مستوى الضغط الموصى به: 95–98%
3) حافظ على غشاء مكافحة الأعشاب مسطحًا ومثبتًا بإحكام.
قد يتسبب الغشاء المطوي في ظهور خطوط مرئية. لتجنب ذلك:
- قم بالتثبيت على طول الحواف
- استخدم دبابيس على شكل حرف U في المنتصف
- تجنب التداخلات التي تُشكّل حوافًا
4) شدّ العشب بشكل صحيح أثناء التركيب
استخدم أداة شد السجاد أو أداة شد العشب الصناعي. يجب أن يكون العشب الصناعي مشدوداً ومستوياً قبل التثبيت النهائي.
5) تأمين المحيط بشكل محكم
يمنع التثبيت المحيطي الحركة ويتحكم في تأثيرات التمدد الحراري.
المسافة الموصى بها بين نقاط التثبيت: حوالي 150 مم للحصول على تشطيب عالي الجودة.
6) استخدم نوع وكمية الحشو الصحيحين
ينبغي أن يكون الحشو كالتالي:
- ينظف
- حجم جسيمات متناسق
- يتم توزيعه بالتساوي ودهنه بالفرشاة على الطبقة الخلفية
تجنب استخدام مواد الحشو منخفضة الجودة مثل رمال الشاطئ، والسيليكا المتسخة، ورمل الأسمنت، أو خبث الفحم.
دليل سريع لحل المشكلات
- تظهر التجاعيد مباشرة بعد التركيب: من المحتمل أن العشب لم يتأقلم / لم يتم تمديده بشكل كافٍ ← تدفئة + تمديد + إعادة تثبيت.
- تظهر التجاعيد في الغالب في فترات ما بعد الظهر الحارة: من المحتمل حدوث تمدد حراري + عدم كفاية الصابورة ← تحسين الحشو + تقوية تثبيت المحيط.
- تجاعيد قرب الحواف: من المحتمل أن يكون تثبيت المحيط ضعيفًا ← تحرير الحافة + التمدد + إعادة التثبيت.
- تجاعيد في منتصف مساحات واسعة: من المحتمل عدم كفاية الحشو أو نقص التثبيت الداخلي ← التمديد + إضافة حشو + إضافة نقاط تثبيت إضافية إذا لزم الأمر.
الأسئلة الشائعة (FAQ)
1) لماذا يتجعد العشب الصناعي الخاص بي؟
تنتج التجاعيد عادةً عن التمدد الحراري، أو عدم كفاية الشد أثناء التركيب، أو عدم كفاية حشو الحصى، أو ضعف تثبيت المحيط. كما يمكن أن يساهم عدم استواء الطبقة الأساسية في ذلك.
2) هل التجاعيد في العشب الصناعي أمر طبيعي؟
تُعدّ التموجات الطفيفة بعد فرد العشب أمراً طبيعياً. مع ذلك، فإن استمرار التجاعيد بعد التركيب عادةً ما يشير إلى عدم تثبيت العشب بشكل صحيح.
3) هل يمكن أن تختفي التجاعيد من تلقاء نفسها؟
قد تقل التموجات الصغيرة بعد التسخين في ضوء الشمس، لكن معظم التجاعيد الناتجة عن مشاكل التركيب لن تختفي بدون تصحيح.
4) كيف يمكنني إزالة التجاعيد من العشب الصناعي؟
قم بتسخين العشب لمدة ساعة إلى ساعتين، ثم أزل الحشوة من المنطقة، وفك المثبتات، وقم بتمديده باستخدام أداة شد السجاد، ثم أعد تثبيت العشب، ثم أعد وضع الحشوة وقم بتوزيعها بالفرشاة.
5) هل يجب إزالة الحشوة قبل التمديد؟
نعم. إزالة الحشوة تساعدك على الوصول إلى أدوات التثبيت وتضمن أن يكون التمديد فعالاً ومتساوياً.
6) هل يمكن أن تصبح تجاعيد العشب دائمة؟
نعم. إذا تُركت في ضوء الشمس الحارق لفترات طويلة، فقد تحتفظ الطبقة الخلفية بالتجاعيد، مما يجعل إزالتها صعبة. عالجي التجاعيد مبكراً للحصول على أفضل النتائج.
7) ما هي كمية الحشو الموصى بها لمنع التجاعيد؟
تستخدم العديد من التركيبات حوالي 5 كجم/م² من الحشو، ولكن الكمية الصحيحة تعتمد على مواصفات العشب وارتفاع الوبر والاستخدام المقصود.
8) هل تعني التجاعيد أن العشب ذو جودة رديئة؟
ليس دائماً. معظم التجاعيد ناتجة عن التركيب أو تحضير القاعدة أو عدم كفاية الحشو وليس عن جودة تصنيع العشب.
9) لماذا تظهر التجاعيد أكثر في فصل الصيف؟
تؤدي درجات الحرارة المرتفعة إلى زيادة تمدد الطبقة الداعمة. وإذا لم يتم تثبيت العشب وتثبيته بشكل صحيح، فقد يتسبب التمدد والانكماش في حدوث تموجات.
10) كانت أرضيتي مستوية من قبل - لماذا تظهر التجاعيد الآن؟
بمرور الوقت، يمكن أن تظهر التجاعيد بسبب هبوط القاعدة، وتفكك المحيط، وفقدان الحشو أو عدم انتظام الحشو، وحركة المرور الكثيفة التي تحرك العشب.
حول Arturf
شركة Arturf هي شركة صينية متخصصة في تصنيع العشب الصناعي، وتُورّد منتجات عالية الجودة من العشب الرياضي، وعشب تنسيق الحدائق، وملحقات العشب إلى جميع أنحاء العالم. إذا كنتم بحاجة إلى توصيات بشأن المنتجات، أو إرشادات التركيب، أو باقة حلول متكاملة للعشب، يُرجى التواصل مع فريقنا.